Thursday, April 29, 2010

Why Wait?

fabric for kids clothes
So, I have decided to begin "Kids Clothes Week" now. I paid a visit to the fabulous Fancy Tiger today and I'm ready to go. I don't think I can wait until the 2nd week of May to get started, especially after finding these lovelies!

Most of the fabric is Moda; my favorite these days! The designs just make me smile. All but one of these prints will be used for the kids. I will be making myself an A-line skirt with one of the Moda prints. For the kids, I plan on making a couple of shirts for JP and skirts, dresses and some pants for the girls.

Oh, fun!

Tuesday, April 27, 2010

Simple or Not?

I've been trying to decide whether I like my blog to be simple or all dolled-up with fancy borders and such; today I'm going with simple. It's almost like deciding to wear lipstick or not--I usually don't. But, if I decide to change it up, I know exactly where to go for some simple (and FREE) blog decor, Shabby Blogs.

Summertime clothes

Just what I needed to get right back to sewing. 
I'm in on this one!

The kids wardrobe is sure to benefit from a week of sewing dedicated to making clothes just for them.

Sunday, April 25, 2010

Tulips

orangeOur flower garden is blooming beautifully with daffodils and tulips. The orange ones are my favorite this year.

flower garden 2010 Note: At the end of Summer 2010, I need to add lots more orange tulips and some white tulips to the garden in the area around the Hawthorn tree. Add more purple, orange, and white tulips in the curved area in front of the clematis.

Thursday, April 22, 2010

The Quick Tote

All of last week I had been wanting to make a tote to give to my daughter's friend for her birthday but just couldn't find the time--having a newborn makes it tough to sew. Thankfully, I was able to make it the morning of the party. It's quick and simple to put together and if you add a book or two you've got a great gift!

The Quick Tote


QUICK INSTRUCTIONS FOR A QUICK TOTE
Final Dimensions: 11" x 15"

Materials:
•fabric A, 3/4 yard
•Fabric B, 1/3 yard
•coordinating thread

Cut:
•fabric A, cut 1 - 20" x 15"
•fabric B, cut 2 - 4 1/2" x 15"
•handles, 5" x 20", cut 2
•pocket cut 1 or more (optional)

Instructions:
1/2 inch seam allowance

•After cutting your fabric, place one piece of fabric B over fabric A along the 15" edge, RS to RS. Stitch and repeat with the opposite end. You will have one long panel measuring approximately 24" x 15".


•Finish the seam allowance with a serger or zig zag then press towards fabric A.

•Top stitch the seam allowance to fabric A. You can use a decorative stitch here, if you wish.

•Attach pocket, if using. This pocket measured approximately 3" x 5". I serged all four sides of the pocket, folded down the top edge and top stitched it, then sewed it on the inside of the tote. Serging the sides of the pocket makes it super-simple and a bit quicker than folding the edges.

•Make the handles: fold in half the long way and crease, bring the edges to the crease and crease again, fold at the first crease (see photo below), then stitch closed. You can also stitch along the opposite side, if you wish. Repeat with the second handle.

•Sew the bag together on the left and right sides, RS to RS. Double-fold the top edge and sew. Attach the handles stitching an "X" to ensure they stay on (see photo below).

•Square the bottom.

Your tote is finished!
The Quick Tote

Monday, April 12, 2010

Origami Pots Tutorial

seedlings 2006

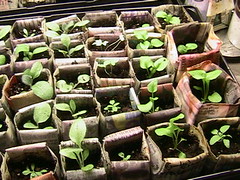
A few years ago I learned to make seed starting pots using newspaper sheets and origami. My seedlings were very successful and when they were ready to be planted it was great to just be able to drop them into the ground without disturbing the roots! I've made these every year since.

This year I had a hard time figuring out how to make the origami pots so I figured I'd write my own tutorial as a reference for years to come. The original tutorial I learned to make these from is now gone. There are other sites that show you how to make the pots--including videos on You Tube--but I found many of them to be more confusing than helpful. So here's a photo tutorial of how I make origami pots. This photo tutorial can also be found on my Flickr account.

ORIGAMI POTS
Materials:
a newspaper, I like to use smaller-sized newspapers

Instructions:
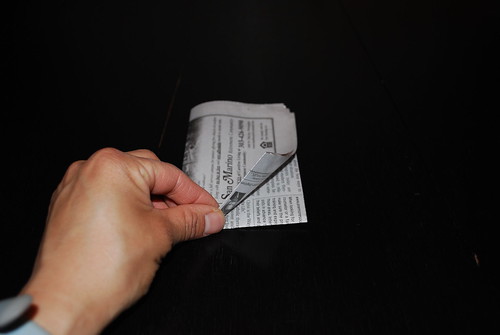
Step 1 - Begin with half of a full sheet from a newspaper.
Step 1 - newspaper page

Step 2 - Fold the page in half taking the bottom end up.
Step 2 - folded page

Step 3 - Fold in half again from left to right.
Step 3 - fold in half again

Step 4 - Rotate the folded paper from Step 3 counter-clockwise one quarter turn.
Step 4 - rotate 1/4 turn

Step 5 - Fold in half again from left to right.
(The crease in this step is important because it will be used as a guide in the following steps.)
Step 5 - fold in half a 3rd time

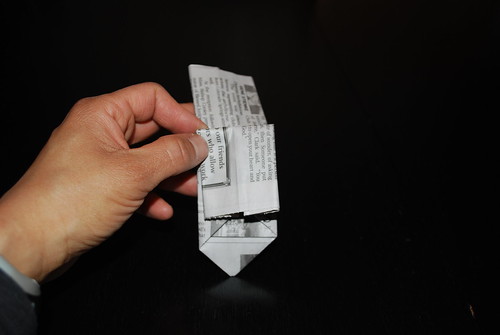
Step 6 - After the crease in Step 5, open the paper so it looks like Step 4 again. Take the bottom right corner of the paper and bring it to the crease made in Step 5 creating this triangle shape and press/crease.
Step 6 - first triangle fold

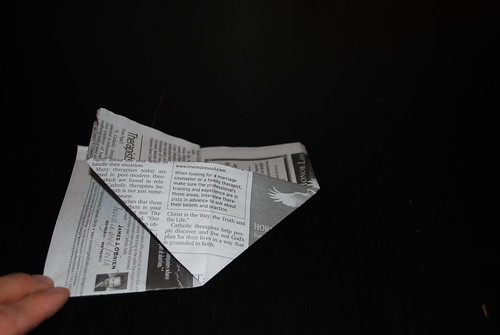
Step 7 - Flip the paper and create the same type of triangle as in Step 6 on the back side.
Step 7 - second triangle fod

Step 8 - Just like turning the pages in a book, turn the left side of one of the triangles you just created in Steps 6 and 7 from left to right. Do this "turn the page" step again on the triangle that is located on the back side.
Step 8 - "turn the page" twice

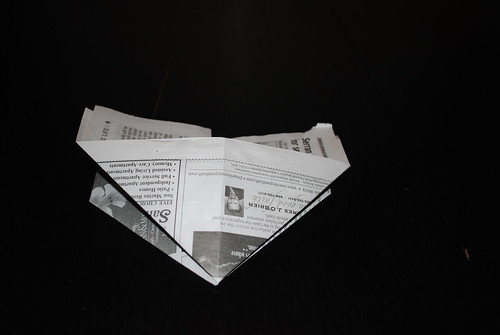
Step 9 - Take the left side of the paper and bring it to the crease made in Step 5 then press.
Step 9 - fold to crease

Step 10 - Take the fold from Step 9 and fold it in half to the crease again.
Do Steps 9 and 10 with the right side of the paper and then flip it and do the same folds on the back side--see Step 11.
Step 10 - another fold to crease

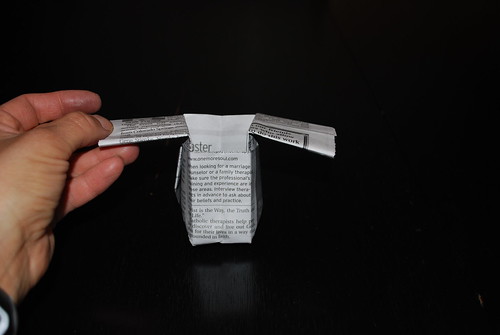
Step 11 - This is what you should have after doing Steps 9 and 10 on 4 sides.
Step 11 - all 4 sides double folded to crease

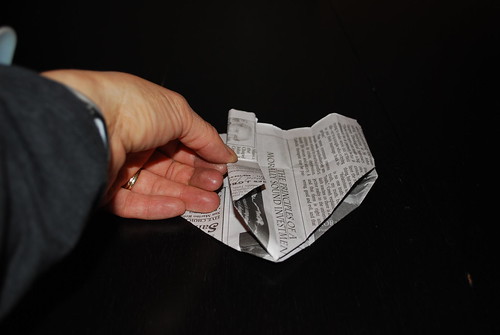
Step 12 - Take the top ends of the paper and fold them down at about the halfway point.
Step 12 - fold down flaps

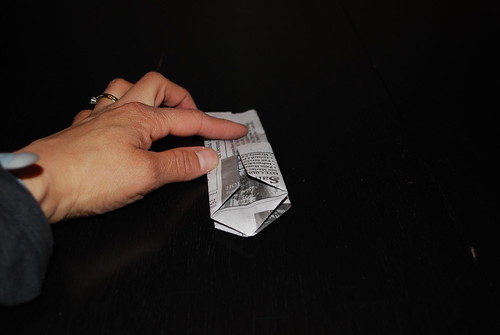
Step 13 - Open the pot and now you have a finished origami pot.
(The flaps can be tucked inside or left out as seen in this photo. I leave them out because the pots will hold their shape once they are filled with seed starting mix/soil and are lined up against each other.)
Step 13 - finished origami pot

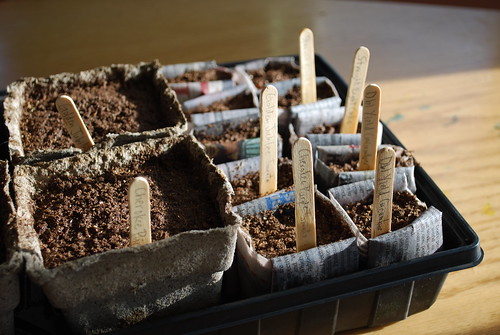
Here are some of the pots I have already put to use. (The taller pots on the left are not origami pots. They are pots made from cow manure that a friend was very generous to share with me.)
Sowing Seeds

Saturday, April 10, 2010

Garden 2010

We have high hopes for a great veggie garden this year after our 2009 "newbie" experience. Last year was our first year growing a larger variety of veggies and it wasn't a flop but just not a great success. We prepared well but the spring weather in Denver was too cold for too long which made everything get off to a late start. Plus, I'm sure our inexperience with vegetable gardening affected our success a bit.

Charlie made 2 great raised beds:
132:365/2009

We sowed some seeds--the "Heritage Farms Favorite Collection" along with some squash and heirloom tomato varieties from Seeds Savers Exchange. We also planted bell peppers, basil, oregano, cilantro, chives, bush beans, peas, onions:
2 great iPhotos


And our harvest was a bit sparse but it was a good learning experience, all in all.
213:365/2009 245:365/2009274:365/2009


The 2010 veggie garden is sure to benefit from last year's experience.
starting the garden 2010
•We will continue to use the Square Foot Garden plan but will not plant in a scattered layout. Instead, we will plant the same crop or similar crops within the same row. This will help when it comes to harvesting mature fruit and will make it easier to see the needs of each crop. Plus, when a certain crop is done producing fruit or is just not thriving, then we'll have more space for planting new crops.
•We will not plant as many vegetables that we aren't accustomed to cooking with or eating and will plant more of the veggies we love. This includes staggering the planting times so that we don't run out of one crop all at once.
•We'll try harder to understand the best time to plant different types of crops, e.g., kale in cooler weather, bush beans closer to the last frost date, sowing cilantro seeds throughout the growing season.
•We will use walls of water for the tomatoes for the first few weeks after they are planted.
•I'm sure there's more that I don't remember now but I'm sure I'll remember as we get going with the 2010 growing season.

What makes your garden grow grand?

Thursday, April 8, 2010

Get Gardening!

I'm a bit behind on the garden thing this year. Yikes! Last year I started the seeds too early (early February) and this year I'm just getting to it--it's already the first week of April!

This past weekend we:
•amended the soil in the raised beds with mushroom compost and a some sort of soil amending compost
•moved an oregano and a chives plant to a new location in the beds (they came back so I figured I would find a new place in the beds for them since I'm taking a different approach with the Square Foot Garden plan)
•planted seeds for kale, chard and lettuce
 
Seeds for carrots, beets and sugar snow peas will go in as soon as I can get back outside. It's a little hard to get much done these days with a newborn but I'm doing what I can when I can; even if it means gardening in my pj's!

Gardening in my jammies

Sunday, April 4, 2010

Dia's Days

Hi.
This is my new* blog.
The blog where I document my life as I make, learn, share, and live.

*You can visit my previous blog, Creativa, to learn and view more about me.