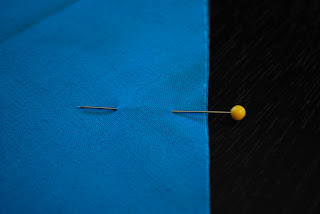
Once upon a time I didn't like to pin my fabric together before sewing. Oh, I was such a novice sewer! I thought pinning was a waste of time. I also thought I was skilled enough to skip this unnecessary step. Well, I've certainly matured and don't believe either of those statements to be true any longer. Pinning is not a waste of time or an unnecessary step and everyone should pin regardless of their skill level!
In fact, pinning will save you lots of time. It's true! It takes less time to pin your fabric together than it does to rip out stitches from your unpinned fabric that shifted and has a bad seam. If pinning feels like no fun to you, then ripping out stitches is going to feel like zero fun!
So, when you do decide to pin, how should you do it? There are a few different ways to pin but I won't tell you which is the "correct" way because I don't think there is a correct way. I will tell you to pin the way that feels more natural to you and the way that you think will hold your fabric together best.
How To Pin
Pin perpendicular to the raw edge with the pin heads sticking out of the fabric--this is the way I pin most of the time. I've always done it this way and I like it because if I decide to sew on the other side of the fabric, all I have to do is flip over the fabric and the pins can stay. That can't be done if you pin parallel or with the pin heads on the fabric.
 |
| Perpendicular Pinning |
Pin parallel to the raw edge. If you choose to pin this way make certain that the pin heads are on the bottom and the point is up. This makes it easier to pull out the pins while you're sewing. Sometimes I pin this way if my project needs to be secured in a way that perpendicular pinning won't secure very well.
 |
| Parallel Pinning |
Pin perpendicular or parallel to the raw edge but in an inch or so in from the raw edge. Some of my Sewing 101 students pin this way and it can be a very practical way to pin if you don't want to stop to take out pins as you are sewing. This may not be the best way to pin every time you sew a seam but it can be helpful when sewing long, continuous seams.
 |
| Pinning away from the raw edge fo the fabric. |
I've noticed that some of my students pin from left to right. I don't think I've ever pinned this way intentionally but I am assuming some people might do this because they are left-handed.
 |
| Pinning from left to right. |
CAUTION
DO NOT SEW OVER PINS! Sewing over pins can damage your sewing machine, break your needle, or hurt you. I will admit that I will sew over a pin in certain unique situations but I do it slowly and cautiously. Otherwise, I pull out each pin before it reaches the presser foot.
TIP
I have a simple tip that will help you when you are pinning a hem, a pocket, an appliqué, or need to pin through only one layer of fabric. Place a quilting ruler between the layers of fabric that you want to keep separate and then pin. This will help you avoid pinning through to the other side and also gives you a hard surface under the fabric to help with pushing through the pin.
 |
| An example of pinning an appliqué to only one layer of fabric. |
I have a favorite pin: the quilting pin. It is long (measures 1 3/4") and stays in place. In the photo below you can see two different-sized pins. The longer pin is the quilting pin. Since most of my sewing involves cotton fabric, I don't worry too much about the thickness of the pins I use. If you use lightweight fabric, you might want to consider using a thinner pin to avoid damaging your fabric.
 |
| General Purpose Pin - 1 1/4" and Quilting Pin - 1 3/4" |
DID YOU KNOW
The tomato pincushion has a little strawberry attached to it for a special reason. The strawberry is filled with silica which helps to sharpen and clean your pins.
If you want to make your own pincushion, find some fabric scraps and check out these cute tutorials:
-Pincushion Jar
-Stickin' it to the Pincushion
-Wild Flower Pincushion

No comments:
Post a Comment