
Last August I had the pleasure of taking a class with Anna Maria Horner. In her class, we learned to piece together the beautiful feather block she designed for the Feather Bed Quilt pattern.
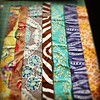
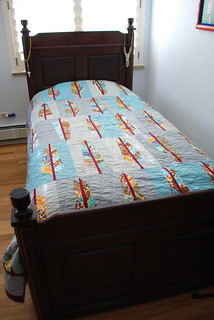
It has taken me 8 months to complete my quilt but it has been worth the slow pace! I chose to make a twin-size quilt with 38 feathers. Anna was helpful in the color selection for the background of the feathers. Instead of choosing one color, there are three different colors: blue, gray, and silver. The feathers are mostly made using Anna's fabric line Field Study.
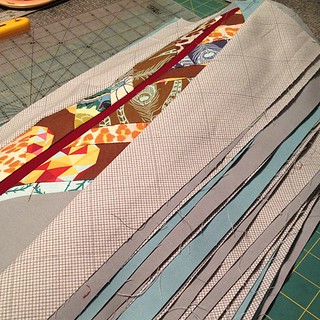
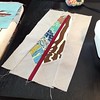
Once all 38 feathers were made, then I had the difficult task of deciding how to lay them out! Oh, that was hard and took me many days to come to a decision. I tried many variations and then finally decided to pair up the feathers by background color in a repetitive order: 2 by 2 by 2, row by row from top to bottom. The feathers that are pointing down are the ones with a solid print on one side.
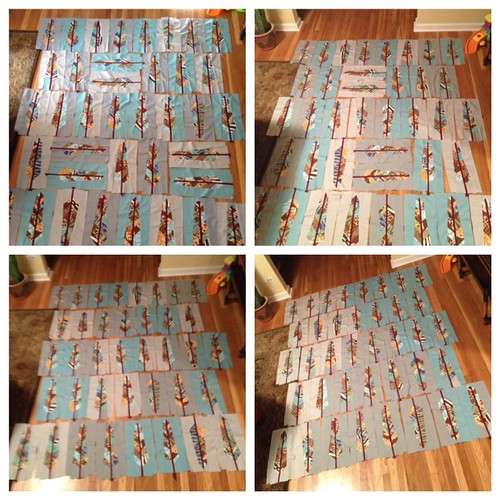 |
| The layout on the bottom left was the winner. |
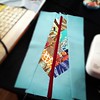
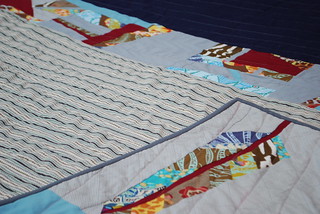
BACK OF THE QUILT: I didn't think much about the design for the back of the feather quilt until I completed the front. I knew I would have to be inspired. Once I got to this step, it also took lots of thinking, dreaming, and looking at fabrics. I intended to use Anna's Field Study fabric but one day I came across Canyon Stripe in New Day from the Hope Valley fabric collection by Denyse Schmidt and I knew it was meant for my feather quilt!
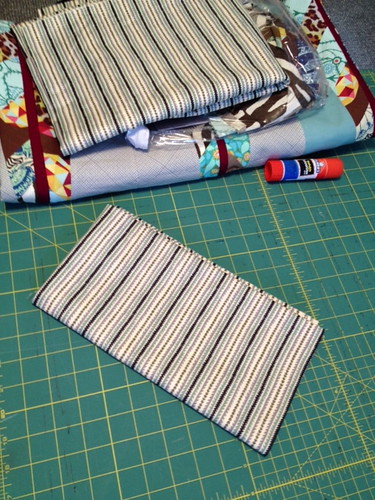
I paired it up with a navy blue Kona cotton but I felt they needed something more. I added a long strip of pieced scraps from the feather blocks to separate the Canyon Stripe fabric from the navy blue Kona. This gave me the opportunity to use up lots of scraps and also play with create-as-you-go piecing.
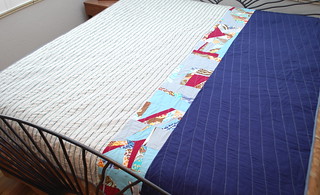
QUILTING: I thought about the quilting design throughout the whole process of making this quilt. The idea that kept popping into my brain was that whatever design I chose it would have to be straight lines, not curves. I thought I would use a long arm machine and I even took a basic class to learn how to use one. That idea didn't last long because I wouldn't be able to quilt straight lines. I almost settled on hand quilting but once I realized it might take me days or weeks to complete, I didn't do it. Finally, I decided on "arrows" because I felt that it was manageable on my home machine. The arrows basically are angled lines that meet in the center of the quilt and point towards the top. I am thrilled with the design and the final look!
 |
| (Look closely to see the quilt lines.) |
And, here it is. . . my finished Feather Bed Quilt!
I love it!

I love it!
 |
| (Believe it or not, this was the weather on May 1, 2013!) |


It's gorgeous, Claudia! Well done, my friend :)
ReplyDelete