Showing posts with label kitchen. Show all posts

Friday, October 4, 2013

Indoor Gardening: Simple Process for Growing Micro Greens

Now that fall has arrived, it's time to clean up the garden and let it rest until spring. Depending on where you live, you might be able to extend the harvest season through October or even November by growing some cool weather crops. I think most of us call it quits, though.

I know I'm feeling done with gardening season but I want to try growing something fun and easy indoors: micro greens. Micro greens are a variety of lettuces, greens, vegetables, and herbs that you grow and harvest just after the plants grow their first true set of leaves and are about 3 inches tall. Micro greens add a fresh and spicy taste to a variety of dishes and are a quick add-in to salads, appetizers/hors d'ouevres, and even smoothies. They make a great garnish too!

I bought a spicy mix at my local garden center.
seeds from Botanical Interests
To grow micro greens:
Use a wide and shallow pot and fill it with potting soil and water.


Scatter the seeds evenly over the top.


Cover the seeds with more soil, about 1/8" depth.


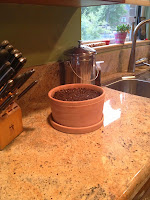
Water again and place on your kitchen counter. You can place the pot of micro greens anywhere you wish. Since I'll be using them for cooking, I figure the kitchen countertop is best.

Within a few days, the seeds will sprout!

Wait until they grow into plants that are about 3 inches tall. Cut and enjoy.

• • • • • • • • • • • • • • • • • • • • • • • • •
I'd love to show you a picture of the happy micro greens I grew but, unfortunately, they didn't make it. The reason for the micro greens fail was because of the conditions for growing the seeds; it was too moist, too warm, and mainly, it was too sunny. Seeds thrive in moist, warm and sunny places but when they get too much of that, they can grow too fast for their own good. My plants were reaching for the light because I left them in the sun all day long and they got too tall (leggy). Their chances for success dwindled because they weren't strong enough to grow healthy.


It's a good thing I can try this easy process all over again! This time around, I'm limiting the watering and the time the seedlings spend in the sun. Making the seeds struggle a bit is good for them. These seeds grow fast and I should have edible micro greens in a couple of weeks! I hope to report back with good news.


Sunday, January 27, 2013

You Are What You Eat

I didn't set out to try something new. It just happened and I'm glad it did.

I came across a cleansing diet in Martha Stewart's February 2013 issue of Whole Living magazine. I've never really tried a cleanse/detox but hear lots of people talk about them so I decided to read the article called Back In Action.


It all seemed well thought out and not too difficult to follow, especially since you get 3 whole weeks of meal plans for breakfast, lunch, and dinner! I could really use some help in the meal planning department these days. Some of the meals repeat which makes it very nice if you are limited on time.


Each week has a different focus and the meals change week by week.
-Week 1 is time to "Clean the Slate"
-Week 2 is time to "Focus on Awareness"
-Week 3 is time to "Form Healthy Habits"

Certain foods are gradually reintroduced into your diet in order to learn how they affect your body. The plan helps to "tune-up" the liver and has you skip six types of food that over-work the liver: processed foods, added sugars, dairy, gluten, alcohol, coffee. It is based on a base diet of lentils, fruits and vegetables, nuts and seeds, with oils and seasonings as well. Overall, I think it can be a good starter cleanse, a Cleanse 101.


My review, one week in:
Greater self-knowledge is a goal of this cleanse plan and I can tell you that within the first 4 days I was already learning a lot about my body, my self (habits), and seeing healthy changes. The most obvious change is with my skin, especially on my face. It feels like my skin can finally breathe because it isn't clogged by oils. The climate in Denver is very dry and so our skin really suffers, but in the past couple of days my skin has felt much more moisturized.

Today I'm on day 6 and I am still amazed at the changes with my skin and how good I'm feeling. I've told friends and family about the cleanse and some have asked about my energy level, if I'm hungry, or if I've had headaches or discomfort. I can gladly say no! The second day was difficult because I felt hungry but this plan also includes some great snack recipes! If you don't have time to make the snacks, then you can have a handful of nuts and two pieces of fruit each day. Today, was also a bit rough because I wanted to eat what everyone else was eating but I was able to stick to the plan. Phew!

I do have to say that while things are going well, logistically it can be difficult--especially if you have a (big) family. Some meals I have made and served for all 6 of us and others have been just for me. This means I am cooking different meals but, as I said before, you are cooking big batches so some cleanse meals are ready to go.

Top: mango-tahini smoothie, blueberry-mint smoothie
Bottom: cucumber-pear juice, pineapple-spinach smoothie

I have some favorites that I know I'll cook once the cleanse is over. I have enjoyed the smoothies/juices and have two favorites: cucumber-pear juice and blueberry-mint smoothie. Mmm. Of the meals, my favorite is the red lentil and sweet potato stew. I do have to say that the creamy broccoli soup (with the addition of a half a lemon) was the first broccoli soup I've made that I liked!

I know a cleanse diet is not for everyone and I am not encouraging you to try this if you are pregnant, suffering from an illness or disease, or if you don't get your doctor's approval. In fact, I just wanted to post about this on my blog because so far I have found this cleanse to be very positive and beneficial for my body. It has also been educational.

Tuesday, May 8, 2012

Mi Cocina Mexicana

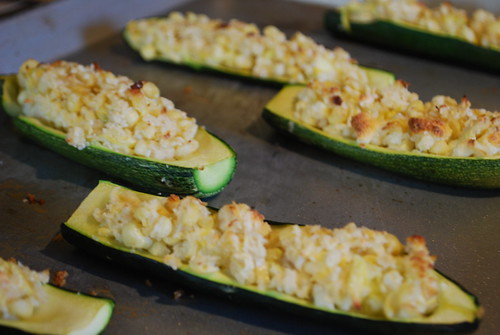
Zucchini Boats
stuffed zucchini

Last week was the start of my goal to purposefully cook more authentic Mexican food. I'm happy to say that the meals I made were eaten and liked by all of my family!

On the menu were,
-sopes* topped w/rajas, chorizo, Chihuahua cheese, and cotija cheese
-stuffed zucchini (we called them zucchini boats)
-roasted salsas
-tacos (made with store-bought corn tortillas but homemade torts. are up next!)
-black beans
(*Thank you Rick Bayless for loving Mexico so much and sharing authentic recipes in your wonderful cookbooks!)
sopes con rajas y chorizo
sopes

As with any type of cooking, it's important to have staple items on hand. For now, those are:
-masa harina
-fresh chile peppers
-dried chiles
-tomatillos
-tomatoes
-radishes (from my garden, I hope!)
-cilantro (also from my garden)
-limes
-corn
-black beans
-Mexican squash
-a variety of Mexican cheeses

This week I've already made black bean chilaquiles and calabacitas (recipe to be posted soon, I promise!). I also hope to make time for dessert; I already have a super yummy recipe for flan!

So, any recipe suggestions, cookbooks, or requests (that I trial first, of course) are accepted! This kitchen of mine is going to become una gran cocina Mexicana!

¡Buen provecho!

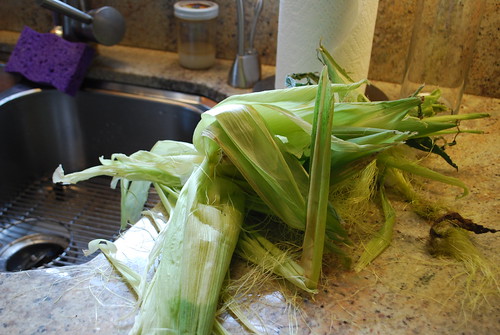
husks
corn husks

Thursday, March 29, 2012

Simple and Yummy Legume Salad

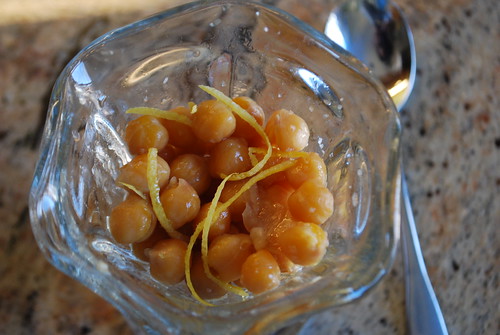
Today for lunch I made this chickpea salad.
It's from long ago on Orangette.
It is so yummy!
just yummy!
I forgot to add the parmesan cheese but it was still good. The chickpeas are not from a can and maybe that's why it didn't matter that the cheese was missing.

Make some and let me know what you think!

Wednesday, January 11, 2012

w/Coconut Milk

Mmm. . .
hot cocoa
I made hot cocoa with some milk and some coconut milk and it. is. good!

Sunday, August 28, 2011

Too much zucchini?

Now there's no more complaining that we have too much zucchini. . .
I shredded zucchini to make zucchini bread and had way too much for the recipe. I had four more zucchini sitting on the counter so I decided to shred it all and freeze it in perfect portions for my bread recipe. We'll be having zucchini bread through fall and winter instead of finding creative ways to use it all now.

Sunday, March 27, 2011

Ka-PLOW!

. . .ka-boom or maybe even just BANG! Whatever the sound was, it was what we heard this evening when the pressure cooker exploded in my kitchen! Yes, the pressure cooker that was supposed to cook the split peas super quick so that I could get our split pea soup dinner on the table sooner rather than later.

The mess was unbelievable and will take a few more days of wiping things down before any trace of split peas is gone; oh, what a fun way to spend spring break this will be. Charlie was a great helper and after helping me wipe down the cabinets and appliances, he wiped down the ceiling too. Split peas were EVERYWHERE. Ugh!

I'm so glad that nobody was hurt. Maria was at the kitchen table writing and I was across from the stove chopping veggies when it happened and neither one of us was hurt, thankfully. We were just splattered with split pea yuckiness. I wish I knew how the split peas actually splattered everywhere since the pressure cook remained closed once it hit the floor. The handle was broken so I couldn't open it and the seal was hanging out of the pot. 

The whole experience made such a big impact (of course!) on Maria that she wrote a letter about it right away. Here's what happened, in Maria's words:

On Sunday, the 27th, of March, 2011, I was in my kitchen writing in my sketch-pad. Then I heard a loud sound, I looked up and saw smoke everywhere. A pot was upside-down on the floor, split peas were all around me. I wondered what had happened. My dad carried me out of the kitchen because the floor was filled with split peas. My mom told John, Julia, and I to go downstairs. When we were downstairs we listened to Justin Bieber and Taylor Swift. I hope the "explosion" never happens again.

Needless to say, we didn't have split pea soup for dinner tonight. I'll make it tomorrow in a regular pot. 

Thursday, December 16, 2010

Before and After

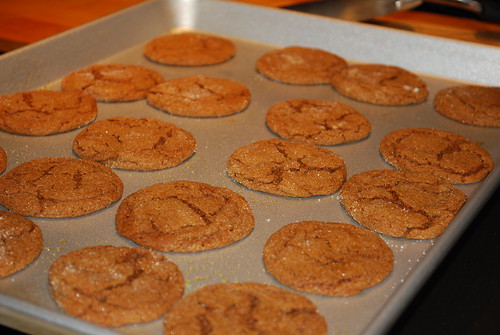
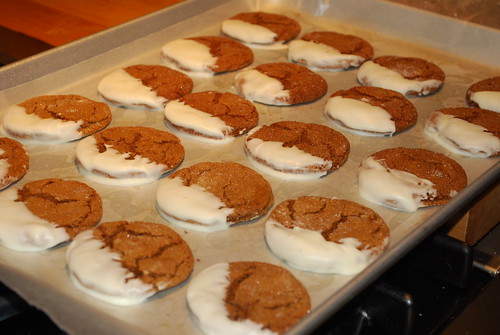
Molasses Spice Cookies
molasses spice cookies, before

Molassses Spice Cookies. . .
molasses spice cookies dipped in white chocolate, after

Yum.

Friday, November 19, 2010

Homemade

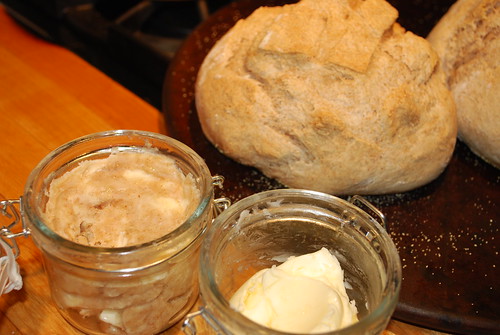
A friend was so nice to share her homemade butter with us--regular butter AND honey cinnamon butter. We've been waiting to have any until we had homemade bread to go with it. Mmmmm.
Bread and Butter

Tuesday, November 16, 2010

Sweet and Spiceeeeeeeeeee

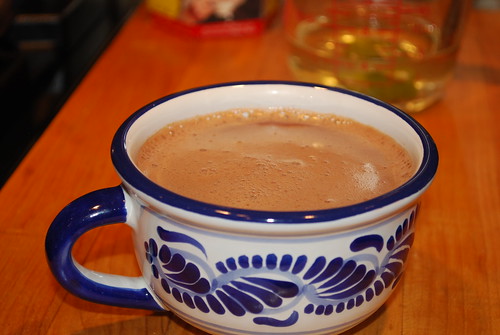
spicy hot chocolate
Mexican hot chocolate is a favorite around here especially when the weather turns cold. We like to buy Abuelita hot chocolate and make it with milk. Although, I tried making it with vanilla soy milk recently and it was even better!

This post was written for you, Grace since I know you like hot chocolate and also since you're my one woman audience on this blog.  AND, if you like spicy, try this. . .

Boil 2 cups of water with a chile pepper that has been cut in half and the stem cut off too. Let it boil until it reduces to about 1 cup. Add some of this water to your finished hot chocolate to give it a spice kick. I think you'll really like it!

Yum!
delicioso

Monday, November 15, 2010

1/8

1/8
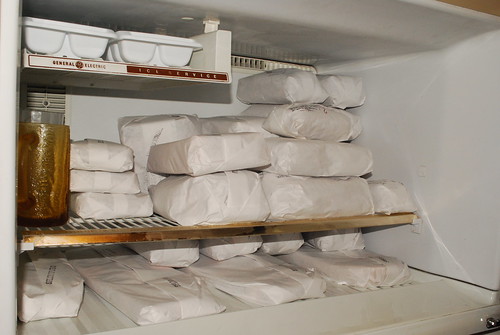
Colorado grass fed beef. 
1/8 of a beef is just enough to fill the freezer of our extra fridge--and still leave a little bit of space for C's beer mugs. Now I have to stock up on good recipes.

Wednesday, May 19, 2010

Aha! The secret ingredient is. . .

. . . Cream of Tartar!!!


I've spent years trying out different chocolate chip cookie recipes hoping to find the one that gives me a cookie that is crunchy on the outside and chewy on the inside. Today I think I finally found the recipe that gives me exactly that! I found it at All Recipes.com, Best Chocolate Chip Cookies. I also learned that adding 1/2 teaspoon of Cream of Tartar gives the cookies a cracked look - not a cakey look.


Best Chocolate Chip Cookies

Ingredients

  • 1 cup butter, softened
  • 1 cup white sugar
  • 1 cup packed brown sugar
  • 2 eggs
  • 2 teaspoons vanilla extract
  • 3 cups all-purpose flour
  • 1 teaspoon baking soda
  • 2 teaspoons hot water
  • 1/2 teaspoon salt
  • 1/2 teaspoon cream of tartar
  • 2 cups semisweet chocolate chips
  • 1 cup chopped walnuts

Directions

  1. Preheat oven to 350 degrees F (175 degrees C).
  2. Cream together the butter, white sugar, and brown sugar until smooth. Beat in the eggs one at a time, then stir in the vanilla. Dissolve baking soda in hot water. Add to batter along with salt. Stir in flour, cream of tartar, chocolate chips, and nuts. Drop by large spoonfuls onto ungreased pans.
  3. Bake for about 10 minutes in the preheated oven, or until edges are nicely browned.