Friday, January 20, 2012

My Good Sewing Buddy, The Seam Ripper

If you've ever sewn something you probably would agree that a seam ripper quickly becomes your sewing companion. We all make mistakes when we sew, no matter how experienced we are. If you need to take out stitches, you better have a good seam ripper! I have a favorite and it's an easy one to find.

Here it is:

I really like this seam ripper because it rips stitches so smoothly and easily--the tip is thin and pointy and the curved blade is very sharp. You do have to be VERY CAREFUL with it, though, because it's so sharp that you can end up cutting a hole in your fabric.

Ripping out seams isn't very fun so use a good seam ripper and you might not mind it as much.

HOW TO USE A SEAM RIPPER
 It's not very hard to do but pay close attention to what you are doing so that you don't damage your fabric when ripping out stitches. When you find the stitch you need to rip, get under the thread with the tip of the seam ripper and then slide the stitch to the "U" shape of the seam ripper, which is the blade. This will "rip" your thread.

You can rip every few stitches on one side of your seam and then pull the thread on the back side and it all comes out in one tug. Some say this is the "correct" way to do it because you are less likely to tear your fabric.
Every few stitches ripped out.
Pulling the thread on the back side.
OR

You can open your seam and rip at the stitches between the fabric, but you risk ripping your fabric if you are too aggressive. Some might say this is the "wrong" way to rip out seams but I tend to rip this way more often because it goes faster. Sometimes this is the only way you can rip out the stitches because they are so small that you can't rip them out the other way.
The stitches between the fabric.
Ripping out stitches.

Do what works best for the seam you have to take out and just be careful.


TIP
Be careful to use the right stitch length (2.5 for a straight stitch) AND do not pull your fabric from the backside of the machine as you are sewing--this will give you uneven stitches! Uneven stitches aren't so pretty and are harder to rip out.

Thursday, January 19, 2012

He's Sew Cool! Part I

sampler
Last weekend I taught my husband to sew. I've been a sewing instructor for close to 5 years and this was his very first lesson. Our daughter joined him because she needed a refresher. The two of them made a good team and helped each other throughout the lesson.
He's sew cool!

He was a star student!
After he mastered the self-threaded. . .
 threading the needle

. . . he made his first seam and it was nice and even from end to end.
First Seam

He was also really good at guiding the fabric with two hands.
2 hands

We moved on to zigzag stitches where I explained how to use the stitch length and width dials. After that, he was ready to experiment on his own.
Look at all those fun stitches!
experimenting

Our next lesson, and the real reason for his interest in learning to sew, will be explained in Part II of "He's Sew Cool". Stay tuned!

Wednesday, January 11, 2012

w/Coconut Milk

Mmm. . .
hot cocoa
I made hot cocoa with some milk and some coconut milk and it. is. good!

Always an Adventure!

Some friends were supposed to come over for lunch today but our plans were canceled because it snowed. With the change of plans, I had more time to take on an adventure so I decided to shovel the sidewalks and driveway. After a bit of shoveling my back started to hurt and I decided it would be much easier to use the snow blower--only problem, I didn't know how to! I called my husband and he talked me through it. Wow, it was fun!

So, I did this
sidewalk
and this 
driveway
with this machine!
the machine

The snow blower is quite powerful and at times it was pulling me along faster than I could walk. It wasn't too hard figuring out how to maneuver but it does take practice. I look forward to the next snow storm. Vroom! Vroom!

Thursday, January 5, 2012

Did you know. . .

. . . that the awesome place where I teach sewing, Fancy Tiger, just moved into an amazing new space? The new shop is at 59 Broadway in Denver.

Fancy Tiger Crafts

I'm here to tell you about it because I'd love for you to come visit and indulge yourself in all the crafty goodness of this lovely shop! I'd especially love for you to take a sewing class with me or any one of our wonderful teachers. The classrooms are big and bright and just amazing.

Fancy Tiger Crafts

Check out our class schedule! We teach sewing and quilting along with knitting, crochet, spinning, and embroidery. And, if you'd like to schedule a special crafty party or get-together, just let me know because we can set something up for you and your friends. I hope to see you soon at Fancy Tiger.

Fancy Tiger Crafts

I took a few quick photos of the shop this week but you can see more on the Fancy Tiger website.


Tuesday, January 3, 2012

Just Pin It!

pins
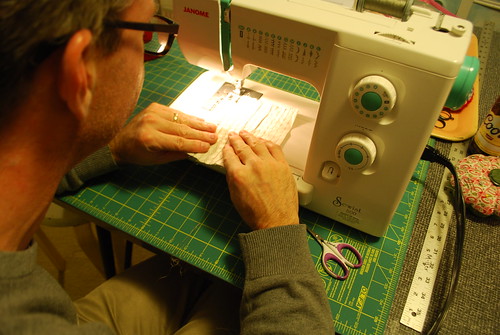
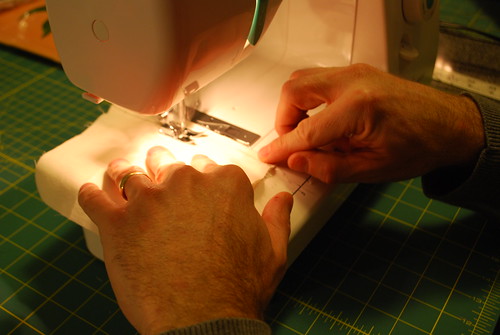
Once upon a time I didn't like to pin my fabric together before sewing. Oh, I was such a novice sewer! I thought pinning was a waste of time. I also thought I was skilled enough to skip this unnecessary step. Well, I've certainly matured and don't believe either of those statements to be true any longer. Pinning is not a waste of time or an unnecessary step and everyone should pin regardless of their skill level!

In fact, pinning will save you lots of time. It's true! It takes less time to pin your fabric together than it does to rip out stitches from your unpinned fabric that shifted and has a bad seam. If pinning feels like no fun to you, then ripping out stitches is going to feel like zero fun!

So, when you do decide to pin, how should you do it? There are a few different ways to pin but I won't tell you which is the "correct" way because I don't think there is a correct way. I will tell you to pin the way that feels more natural to you and the way that you think will hold your fabric together best.

How To Pin
Pin perpendicular to the raw edge with the pin heads sticking out of the fabric--this is the way I pin most of the time. I've always done it this way and I like it because if I decide to sew on the other side of the fabric, all I have to do is flip over the fabric and the pins can stay. That can't be done if you pin parallel or with the pin heads on the fabric.
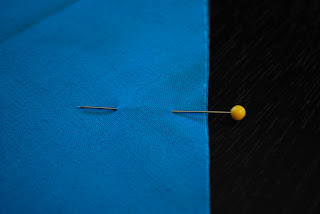
Perpendicular Pinning

Pin parallel to the raw edge. If you choose to pin this way make certain that the pin heads are on the bottom and the point is up. This makes it easier to pull out the pins while you're sewing. Sometimes I pin this way if my project needs to be secured in a way that perpendicular pinning won't secure very well.
Parallel Pinning

Pin perpendicular or parallel to the raw edge but in an inch or so in from the raw edge. Some of my Sewing 101 students pin this way and it can be a very practical way to pin if you don't want to stop to take out pins as you are sewing. This may not be the best way to pin every time you sew a seam but it can be helpful when sewing long, continuous seams.
Pinning away from the raw edge fo the fabric.

I've noticed that some of my students pin from left to right. I don't think I've ever pinned this way intentionally but I am assuming some people might do this because they are left-handed.
Pinning from left to right.
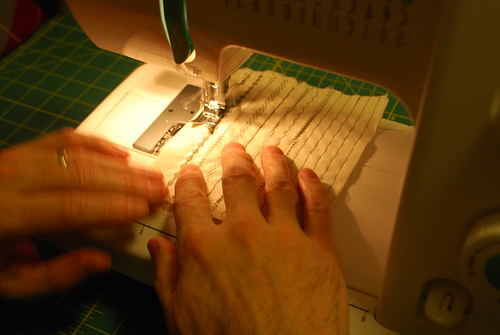
CAUTION
DO NOT SEW OVER PINS! Sewing over pins can damage your sewing machine, break your needle, or hurt you. I will admit that I will sew over a pin in certain unique situations but I do it slowly and cautiously. Otherwise, I pull out each pin before it reaches the presser foot.

TIP
I have a simple tip that will help you when you are pinning a hem, a pocket, an appliqué, or need to pin through only one layer of fabric. Place a quilting ruler between the layers of fabric that you want to keep separate and then pin. This will help you avoid pinning through to the other side and also gives you a hard surface under the fabric to help with pushing through the pin.
An example of pinning an appliqué to only one layer of fabric.
PIN SIZES
I have a favorite pin: the quilting pin. It is long (measures 1 3/4") and stays in place. In the photo below you can see two different-sized pins. The longer pin is the quilting pin. Since most of my sewing involves cotton fabric, I don't worry too much about the thickness of the pins I use. If you use lightweight fabric, you might want to consider using a thinner pin to avoid damaging your fabric.
General Purpose Pin - 1 1/4" and Quilting Pin - 1 3/4"

DID YOU KNOW
The tomato pincushion has a little strawberry attached to it for a special reason. The strawberry is filled with silica which helps to sharpen and clean your pins. 

If you want to make your own pincushion, find some fabric scraps and check out these cute tutorials:
-Pincushion Jar
-Stickin' it to the Pincushion
-Wild Flower Pincushion

Monday, January 2, 2012

Penmanship

sample of my handwritingMy penmanship sucks. Yes, it's true but I hope to change that this year. Some people might think that's crazy because "who writes anymore" with email, texting, and IM? Well, I happen to do a lot of handwriting every day and am very unhappy with my chicken scratches. I think handwriting is an art form that is under-appreciated and I'd like to appreciate my own handwriting a little more.

To improve my penmanship, I will:
how I hold a penPractice: My goal is to practice handwriting every day even if it's for just a few sentences. I will read websites with helpful tips and techniques and might finally learn to hold my pencil the "correct" way--just like Mrs. Green, my first grade teacher, worked so hard to teach me to do so many years ago.

journal for handwriting practicePaper: I will practice my handwriting in an inexpensive journal that's been sitting around for years just waiting to be used. It will do for now but my guess is that there will be some useful suggestions on the Internets about what type of lined paper to use. I've been considering buying a journal/notebook with graph paper so that I have to pay more attention to each letter I am writing. I'm even open to writing on penmanship paper that is used in elementary school! I just cleaned out my teaching files and found a nice stack of this paper; I will make sure to keep a few sheets for myself.

a variety of pens and a pencilPens/Pencils: Don't we all have a favorite pen or pencil we like to use for handwriting? I do. My preference for a particular type of pen/pencil changes often but right now I prefer using a mechanical pencil over a pen. If I do use a pen, I like a medium point ballpoint pen.

I'm excited to finally work on improving my penmanship--it's been horrible since after college! I'll be starting here, "Tips for Improving Your Handwriting".

Sunday, January 1, 2012

Welcome, Neighbors!

We have new neighbors and I wanted to welcome them with a handmade gift.
oven mitt and pot holder (front)
I made an oven mitt and a pot holder. 

My goal was to use materials I already had in my stash. I made the oven mitt first with fabric I had pre-cut for an oven mitt long ago; it was just waiting to be used! It's amazing what you find when you clean out and organize your sewing room!

Then I found fabric scraps to make a matching pot holder.
fabric selection for a pot holder

The pot holder went well until I was ready to add the binding. I chose a green-colored fabric but wasn't thrilled with it. Thankfully, I made a "good" mistake. I sewed the binding on wrong--a single layer instead of folded. Oops!
mistake on pot holder
I removed it and decided to bind with a yellow fabric instead. Much better!
pot holder with binding

The quilting is random and includes a few zigzag stitches--another "happy" mistake. I didn't realize the machine was set at a zigzag stitch when I started to quilt so rather than take out the stitches, I just went with it. I like it.

I enjoyed making this set. It was another quick and simple project. Both pieces were inspired by Denyse Schmidt.

oven mitt and pot holder (back)
The back of the oven mitt.